Tips Before Exporting Your Files
Before you export your files, it is a good idea to look them over to be sure that they are properly prepared for mastering.
For example, compare the two waveforms below. The one on the left is what a waveform should look like after mixing and before mastering. The one on the right likely has a limiter on the master bus.
For effective mastering to occur, you should change this before exporting your file.

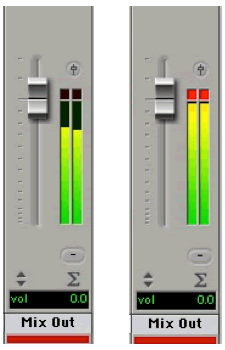
Take a look at the meters on your individual tracks as well as your master fade track so that there is sufficient HEADROOM for mastering.
Lowering the levels on the individual tracks will likely lower the level of the the master fader.
If your master fader is still clipping or "in the red", you will need to bring it down too. So that it resembles the image to the immediate right.

On the individual tracks NO meters should be clipping or "in the red", as shown in the image to the immediate left.
If your meters are "in the red", you will need to bring the levels down before exporting your file, so that they more resemble the image to the far left.
Headroom is important because it allows your engineer to make EQ and compression adjustments without adding gain (which can cause distortion if your files are already limited). A lack of headroom limits your engineer significantly.
We recommend having between 6db and 12db of headroom on the master fader.
Following the above steps before exporting and submitting your files for mastering will...
- give your mixdown clarity
- provide definition of the instruments
- give your master engineer the best possible file to work with.
EXPORTING FILES, "BOUNCE"
Follow these steps to successfully export your tracks into a stereo audio file.
While our example uses Pro Tools, other DAWs (Cubase, Logic Pro X, Ableton, etc.) allow you to also export or "bounce" your file to a .WAV or .AIFF file.
The procedure should be similar to that outlined below.
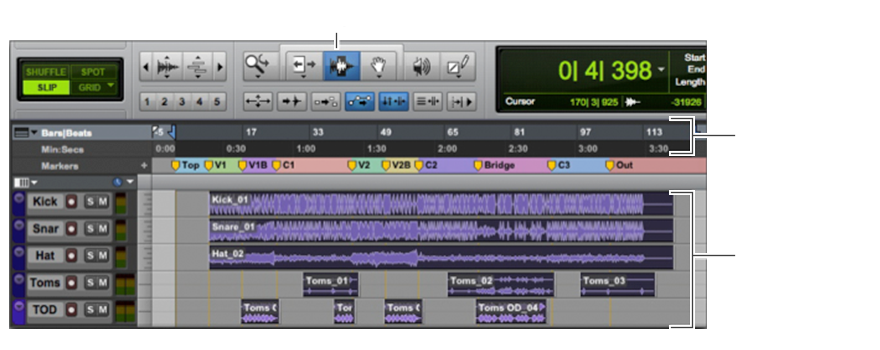
1. Use the selector tool to select the length of the session in the timeline.
The length you set here will determine how long the exported audio file will be.

2. Choose FILE > BOUNCE TO > DISK
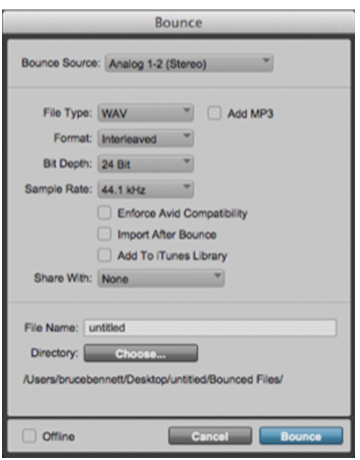
3. When the bounce dialogue box opens, make sure the bounce source is set to your MAIN OUTPUT. For example: Analog 1-2 (Stereo).
4. Select the desired File Type for your audio file. We accept WAV and AIFF files, as these files provide the best results. If you do not have WAVE or AIFF files, talk to your master engineer about alternative options.
5. Under Format, select INTERLEAVED.
6. For Bit Depth, select 24BIT.
7. For the Sample Rate, select the setting in which your project is in. Normally, this is 44.1kHz; if you recorded at a higher sample rate, use the rate that your project is currently at.
8. Enter the file name, and choose the destination where it will be saved.
9. If you have Pro Tools 11, you can select OFFLINE to bounce the song faster than real time. If you don't select Offline, Pro Tools will bounce your song in real time.
10. When you're done, click BOUNCE.
11. If a Save box opens, confirm the name and location of your project, then click SAVE.

