Tips on Preparing Your Files
Preparing Tracks for Album Sequencing
Because no sound adjustments are made with this service, we will accept .WAV, .AIFF, .MP3, .M4A or .WMA files

Preparing Tracks for Album Tune-Up
STEP 1 - Album Tune-Up
The file should be a stereo. WAV or .AIFF file
STEP 2 - Album Tune-Up
The bit depth should be a 24 bit (or higher); up to 96k accepted.
STEP 3 - Album Tune-Up
The sample rate should be the same sample rate as your session. This is usually 44.1 kHz, but it may be different
STEP 4 - Album Tune-Up
The output level on your 2-track stereo meter should be low enough to provide 6 to 12 db of headroom to your audio engineer.
Don't forget....
File types such as .MP3, .M4A, or .WMA are not accepted for mastering unless you have no other option.
These file types will not allow our engineers to produce the best quality productions.
Preparing Tracks for Stereo Mastering
STEP 1 - Stereo Mastering
The file should be a stereo. WAV or .AIFF file
STEP 2 - Stereo Mastering
The bit depth should be a 24 bit (or higher); up to 96k accepted.
STEP 3 - Stereo Mastering
The sample rate should be the same sample rate as your session. This is usually 44.1 kHz, but it may be different
STEP 4 - Stereo Mastering
The output level on your 2-track stereo meter should be low enough to provide 6 to 12 db of headroom to your audio engineer.
Don't forget....
File types such as .MP3, .M4A, or .WMA are not accepted for mastering unless you have no other option.
These file types will not allow our engineers to produce the best quality productions.
Preparing Tracks for Mixing
STEP 1 - Mixing
For best results, we request that you supply us with your version of your mix down as a single audio file so we can get a good feel for you how would like it to sound.
Please leave your stems "wet". All processing on individual instruments should be left ON, while making sure that processing on the master channel is turned to OFF. Compression, EQ, Effects, etc
STEP 2 - Mixing
Export each channel individually using the same export settings as the samples you are using. For example if you are using 24 bit samples, export in 24 bit.
Be sure to leave dithering and normalization off during export
STEP 3 - Mixing
Separate your instruments (bass lines, kicks, hats, clap/snares -into their own channels (stems).
For example, if you have multiple bass lines, be sure to separate those into their own channels.
Preparing Tracks for Stem Mastering
STEP 1 - Stem Mastering
Record or bounce your final stereo mix as you normally would.
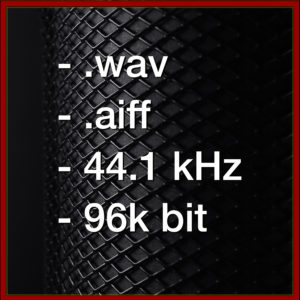
- The file should be stereo .WAV or .AIFF file
- The bit depth should be a 24 bit (or higher); up to 96k accepted
- The sample rate should be the same sample rate as your session. This is usually 44.1 kHz, but it may be different
- The output level on your 2-track stereo meter should be low enough to provide 6 to 12 db of headroom to your audio engineer
- Do no zip, rar, or otherwise compress any audio files
STEP 2 - Stem Mastering
Create a folder on your hard drive labeled with the name of the song you're working on [USE THE NAME OF YOUR SONG]. Include the current date in your folder name
STEP 3 - Stem Mastering
Name the file YourSong_Mix.wav and put it into the [YOUR SONG NAME] folder (no brackets needed)
STEP 4 - Stem Mastering
Without changing any levels, any plug-ins, automation, or anything else:
- Make a stereo Drum separation (through your stereo bus, just like your regular mix).
Mute (or disable the outputs of) all tracks except the drums. Record or bounce this drums-only part of your mix to a 24 (or higher) bit stereo file with all drum-related reverbs and effects. Go through your stereo bus exactly as you would for any normal mix; also acceptable are dual mono tracks (which combine to stereo) or stereo interleaved files. Don't change any plugin settings. Name the file YourSong_Drums.wav (meaning use your song title). Sample rates of 44.1k, 48k, 88.2k and 96k are accepted; use whichever rate your session used. Put this file in the same folder [Your Song Name] as the stereo mix. Using your song name(s) helps identify and organize the separation tracks. Do not make a mono track. Do not zip, rar, or otherwise data-compress your audio files. - Make a stereo Bass separation (even if there's only one bass track).
Mute or disable the outputs of all tracks but the bass track(s). Record/bounce this bass-only separation "mix" in 24 bit or higher stereo—not mono—with all related effects, using your normal stereo bus (including any stereo bus processing). Name this file YourSong_Bass.wav and put it in the same folder as your approved stereo full mix. Do not make a mono track. Do not zip, rar, or otherwise data-compress your audio files. - Make a stereo Instruments separation (always through your stereo bus).
Mute or disable the outputs of all tracks but the remaining (non-drum/bass) instruments. Record or bounce this Instruments-only (no backing vocals) separation "mix" in 24 bit stereo (or higher) with all related effects using your normal stereo bus (including any bus processing). Name the file YourSong_Instruments.wav and put it in the same folder as the other separated tracks. Use the actual name of the song (YOUR SONG is just for illustration). Do not make a mono track. Do not zip, rar, or otherwise data-compress your audio files. - Make a stereo Vocals separation (include all effects, plugins, etc.).
Mute or disable all tracks but the vocals. Record or bounce the vocals portion separately as 24 bit or higher stereo (with effects) through your stereo bus. Don't change any plug-ins. Name the file YourSong_Vocals.wav and put it in the same folder. Use the name of your song. Do not make a mono track. Do not zip, rar, or otherwise data-compress your audio files. - If you separated the bass as well as the instruments, vocals, and drums, you have now recorded five files - four separations and the stereo mix - into one [Your Song] folder.All files must be in stereo, each bounced the same way through your stereo bus output.
- (YourSong)_Full Mix.wav
- (YourSong)_Drums.wav
- (YourSong)_Bass.wav
- (YourSong)_Instruments.wav
- (YourSong)_Vocals.wav
STEP 5 - Stem Mastering
Check your separations
- Load them into a new mix session. The combined separations should sound the same as your stereo mix file, just more open and less compressed.
You may see "overs" in your stereo meters from the separations because the transients come through more. This is normal, although "overs" are not as common when a good amount of headroom is left in the original stereo mix.
Remember, the meter you like your stereo mix, the fewer separations you'll need. Four or five is ideal. If you have more concerns about your mix, make a g reader number of separations. The maximum accepted is eight (plus the stereo mix).
IMPORTANT TIPS AND POINTS TO REMEMBER
- Be SURE you leave your computer automation ON for each separation. This ensures that every sonic move you make in your stereo mix is retained in the separations.
- Don't change any aspect of your mix during the process; this is only a process of disabling and enabling different tracks (disabling/enabling).
- Start the song at the exact same place.
- Organize your files. Each song should be saved as a separation session, clearly named, and saved in the correct place. This will help avoid confusion and missing files later on. Adding the date to the folder will help you differentiate the files from other versions down the road.
- If you are recording "wild" onto a separate computer or Masterlink, clone a cue "tick" (like a drum cross-stick or other percussive sound) at the beginning of one track that is within each set of Separation tracks. We will line up your tracks using your sound cue.
- Keep count of all the tracks that you are muting/turning off. Every element in your mix—every plug-in, automation move, musical component—should go into the separations. When recombined together, they exactly add up to the stereo mix. (Note: if you've used stereo bus compression, each separation will be less compressed than the full stereo mix. When recombined in mastering, this compression will be restored.)
- All separation tracks should be in stereo. Mono tracks are not accepted.
- Accepted sample rates include 44.1k, 48k, 88.2k, and 96k.
- Accepted bit rates are 24 bits or higher, up to 96 bits.
- Use uncompressed WAV or AIFF files. MP3s, zip, or rar files are not accepted.
